

Kristi Webb is a Senior Consultant at ThreeWill. She has over 18 years of software development experience working on software solutions and integrations for enterprise and product solutions. Her passion is applying technology solutions to solve business problems and improve efficiency.
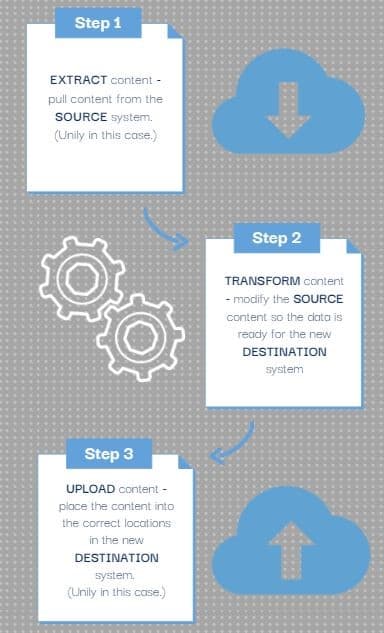
In the previous blog posts in this series, we discussed the extraction and transformation of data from the Unily platform so the content was ready for upload into the latest version of Unily. This blog post will highlight the data upload details required to move the content into the new Unily platform. Of course, the target system could be any type of platform, such as SharePoint Online/Teams in M365.
In this blog post, we will discuss the data upload process and any challenges we had to overcome uploading the data via the Unily APIs.

Upload Process
Once the content and any related media items were properly transformed, the key step for upload was updating the Parent ID to the correctly mapped location in the new Unily platform. Basically, the ParentID had to be swapped out from the old location to the new location. Specifically, this requires the replacement of the ParentID property value in the JSON object for the content or media item, to ensure the item would be uploaded into the correct repository or media folder storage location, respectively. The ParentID property value is a GUID that should represent the parent container in the new system. The content items are uploaded using the /content API endpoint.
In the case of Media Items, the media was generally organized by each Unily site, and this customer wanted to maintain the same media structure (where the media items were grouped by site). If they had been merging sites together as part of the migration, this mapping would have been more complex. It would require a check for duplicate media file names, but we did not have to worry about this since the same media structure was maintained.
As discussed in the previous transformation blog post, a key step for uploaded content items that had related media items was the need to first determine the URL for the media binary file when it was uploaded. Once the binary URL is known, it can be updated in the Media item JSON and uploaded to the new Unily instance. The Media item must always be migrated before the content object since the content object contains any references to media items.
Overall Migration Process
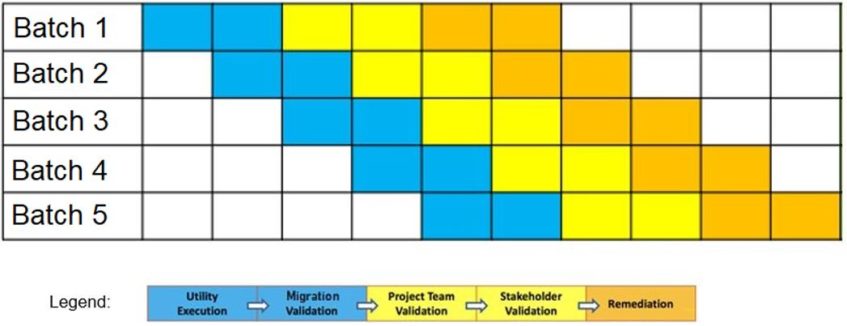
Several Unily sites were grouped together into batches to allow for a scheduled migration that would ensure a known number of sites were migrated every couple of weeks. The Upload process in our utility queries the MongoDB database for all content items that belong to each site in the current batch to determine which content (and any related media items) need to be uploaded for a particular batch. Each batch is migrated and validated as the migration project continues until all the content is moved to the new destination.
Summary
Hopefully, this blog series has given you an idea of the overall process we follow for our Enterprise migration projects as well as the Unily specific details that we learned from this project. If you need help with a Unily migration we would love to use our utilities and share our knowledge to help you achieve your migration goals.
Unily Migration Series:
Overview of Unily Migrations
Unily Migration Step 1: Data Extraction
Unily Migration Step 2: Data Transformation
CONTACT THREEWILL TO LEARN MORE ABOUT UNILY MIGRATIONS TODAY!