
Mike is a Principal Consultant for ThreeWill. He has a passion for solving problems, most notably through products or platforms. He has almost 20 years of experience in product development and leadership, using the latest and greatest technologies, including open source technologies.
Introduction
Modal windows and pop-ups are a staple of applications. Have you ever wanted to quickly make one in your PowerApp?
Here is a quick and easy step-by-step demonstration of how to make a pop-up modal window on a screen in your PowerApp.
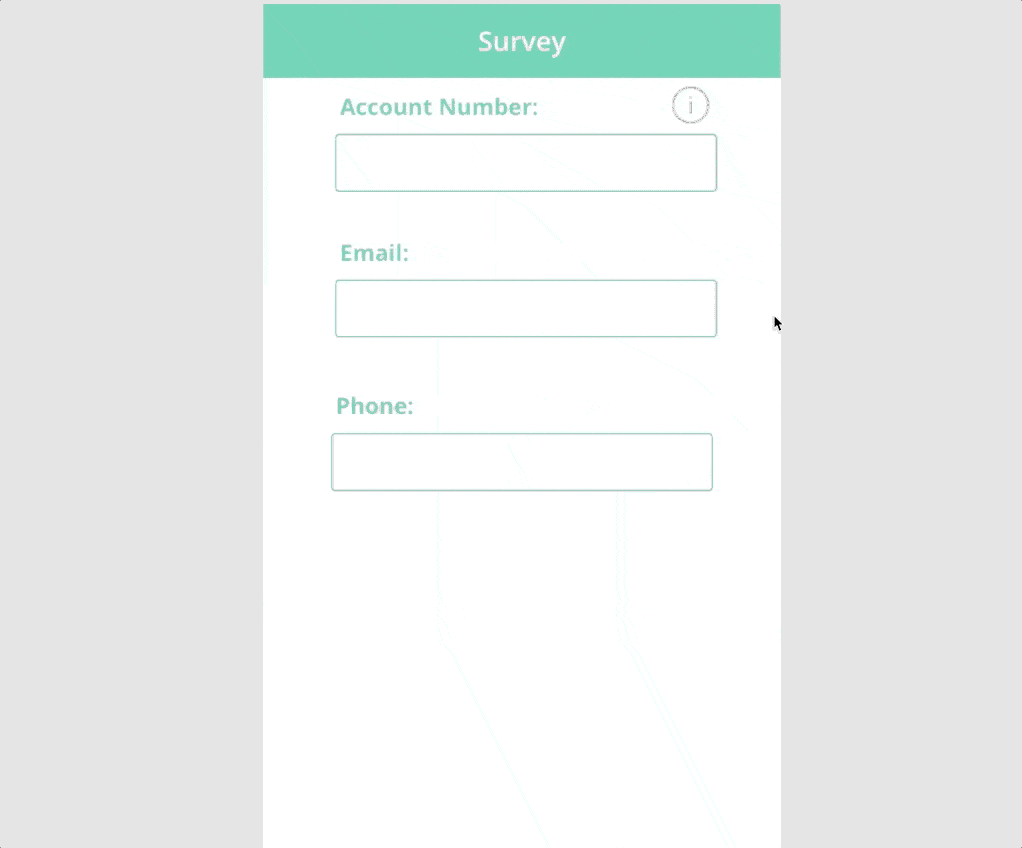
First, let’s assume we have an app screen that is collecting survey data.
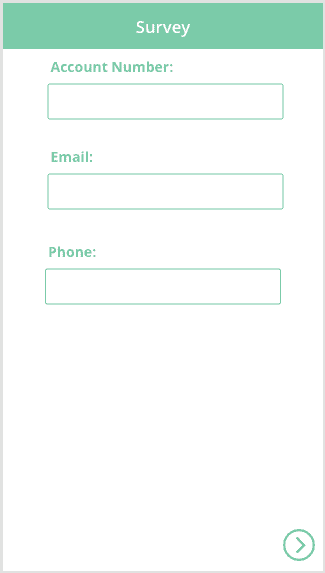
It would be nice if we could provide a little more information to explain the account number that is needed.
Begin by inserting a new “information” icon onto the survey.
![]()
Select your screen and add the following to the OnVisible event:

Next, select the new information icon and add the following to the OnSelect event:

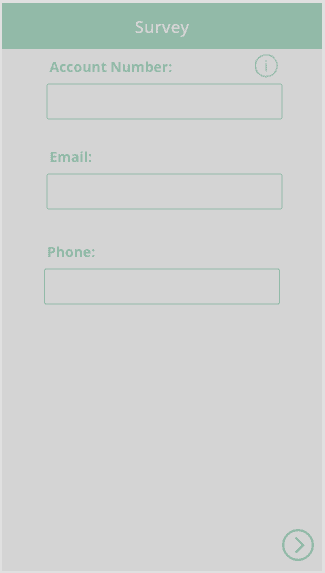
Insert a label onto the screen and adjust the width and height to cover the entire screen. Name this label “ModalBackground” and remove the content in the text box.
Next, set the Fill property of this background label to RGBA (169,169, 169, .5).
It should look like this:
Add a second label and name if ModalBox. Center its horizontal alignment and make the vertical alignment in the middle.
Next, change the box fill to white. Center and align the text, and add additional padding.
It should look something like this when you’re done.

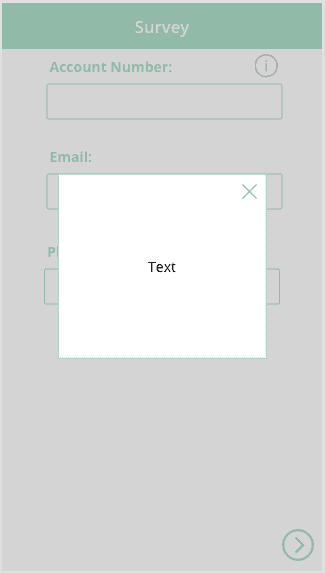
Change the Text property of the ‘ModalBox’ label to ModalText.
Add a Cancel Icon to the screen and place it in the top right corner of the ModalBox label. Name it ModalClose.
Now you have something like this.
Place the following code in the OnSelect event of ModalClose:

Group the 3 new controls you have added and name the group Modal.
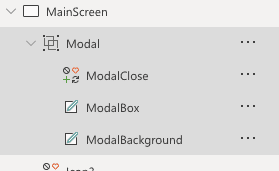
Set the Visible Property of the modal group to ShowModal.
Your modal should look and work like this:
This is a quick and painless process to have modals at your disposal in your next PowerApp. Happy low-coding!
CONTACT US TO LEARN MORE ABOUT OUR INNOVATION PRACTICE!