
Jim Ebert is a Project Manager and Principal Scrum Master at ThreeWill. He has over 30 years of experience as a business and technology leader with demonstrated success in managing and delivering mission-critical projects and initiatives.
Introduction
When someone says the word “list”, my ears perk up. As a Project Manager / Scrum Master, a key part of my role is to be organized. As such, lists play a big part, particularly when it comes to risks, issues, decisions, and changes. So, when I heard that Microsoft Lists was now available as an app in Teams, I knew I wanted to play around and see how it worked. In this blog post, I will outline the steps on how to create custom formatted lists in Microsoft Teams.
Recently we, as a project management team, have had several discussions on how to best track and communicate project risks, issues, etc. in a standard way. Given this, I thought I’d use the Lists app to build out some ‘templates’ and see how they could be incorporated into Microsoft Teams, our primary collaboration workspace for all our projects.
You do not need to have any technical experience on how to create SharePoint lists.
Here are the steps that I went through to create a project Risks list through the Microsoft Lists app within Microsoft Teams. What I came away with through this process is that you do not need to have any technical experience on how to create SharePoint lists. The Lists app walks you through the entire process and allows for implementing some neat features without having to write any code. And the only time I needed to go into SharePoint itself was to create a calculated field in the new list for calculating Risk Exposure based on values in Risk Probability and Risk Impact and I could not do this through the app.
How to Create Custom Formatted Lists in Microsoft Teams
Step 1: Creating the List
- In the Teams channel where you want to create a Microsoft List, click the “Add a tab” item.
- If the ‘Lists’ app is not shown, click the ‘See all’ icon to find it then click on the Lists icon to start the wizard.

- When the ‘Lists’ pop-up window appears, click ‘Save’.

- You will then be returned to the Teams channel and will be sitting on the new ’Lists’ tab.
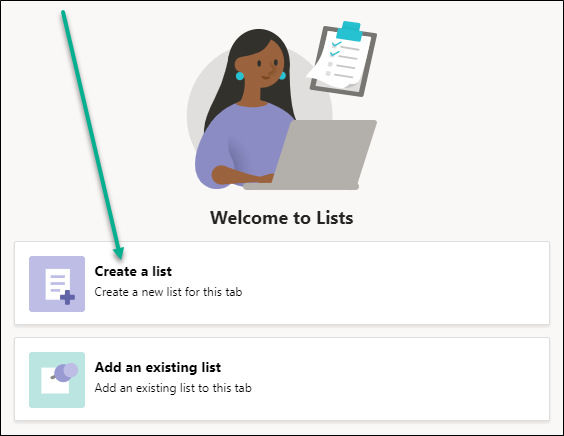
- To start creating your new list, click the ‘Create a list’ link.
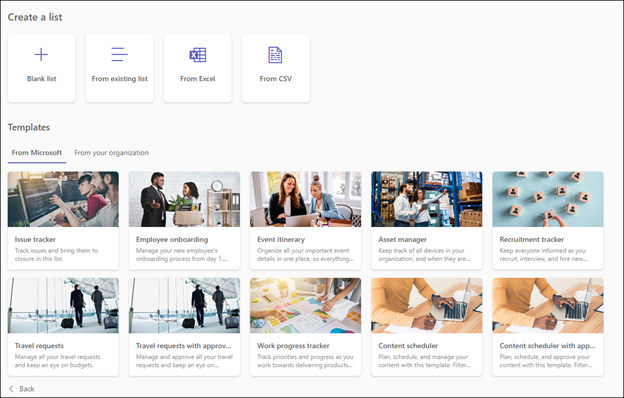
- After selecting ‘Create a list’, the following will be displayed. As you can see, Microsoft provides some pre-created templates that you can use if desired. To learn how Lists worked, I wanted to create a new list from scratch, so I selected ‘Blank List’.
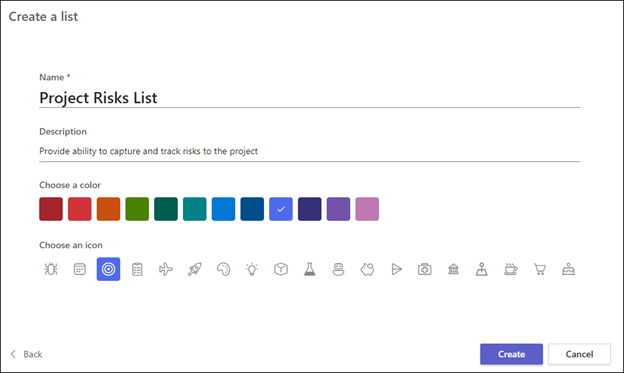
- A screen will be displayed where you can give your list a name and description, a general color scheme, as well as pick an icon for your list. Once you have provided this information, click ‘Create’.
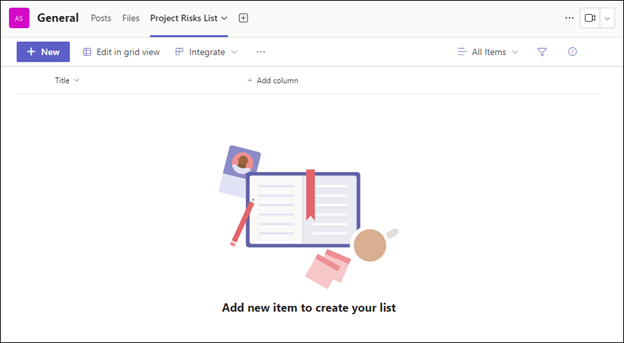
- After clicking your list will be created and the following will be displayed. Note how the ‘Lists’ item in the menu has now been renamed to the name you provided above – in this case, ‘Project Risks List’. And since you are creating a new list from scratch, the only column the list contains to start is ‘Title’.
Step 2: Adding Columns to Your List
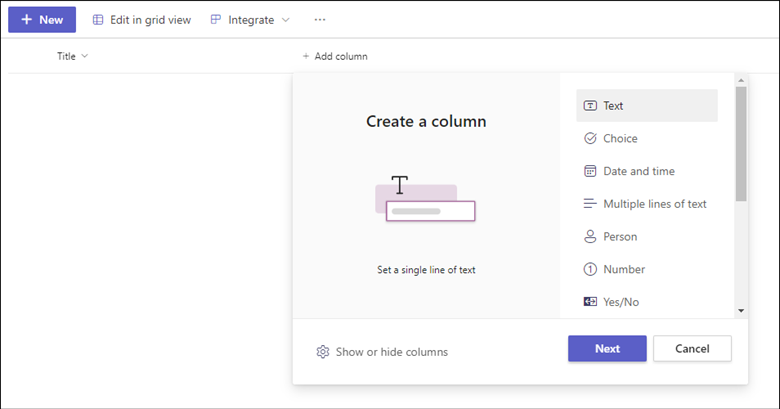
- To add a column to your list, select the ‘Add column’ item. Here, you can then select which type of column you want to create. At this point, the functionality to add columns to your list is essentially the same as if you were doing so directly within SharePoint itself. One difference, however, is that in the below image, you do not see the ‘More…’ option, which in SharePoint, would open the List Settings ‘Create Column’ page.
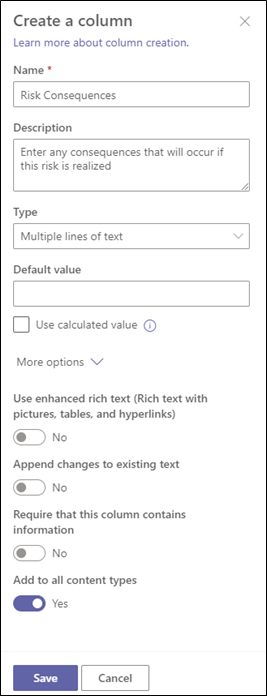
- Here is an example where I created a ‘Multiple lines of text’ field called ‘Risk Consequences’ and added a description. As you can see, there are other options you can select/use if desired.
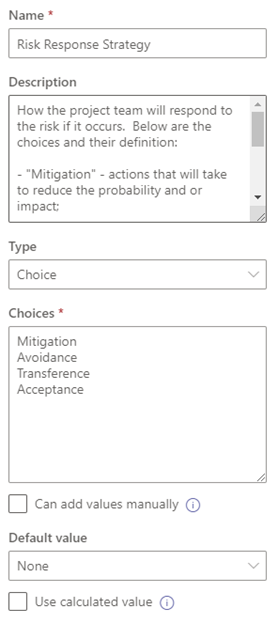
- Below is another example where I created a ‘Choice’ field called ‘Risk Response Strategy’.
- Once you have added all the columns you desire, then it is time to move onto the fun stuff: column/row formatting.
Step 3: Custom Formatting Your Columns or Rows
Custom Formatting in a Column
Like Excel’s ‘Conditional Formatting’ feature, you can apply some customization in your columns based on column values. And again, the functionality is the same as if you were formatting the list from within SharePoint itself.
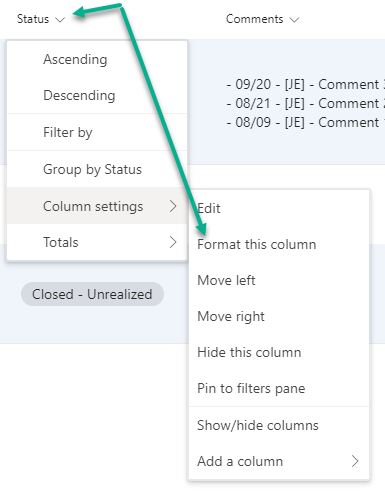
To start formatting a value in your column, select the down arrow for the column and select ‘Column Settings’ then ‘Format this column’.
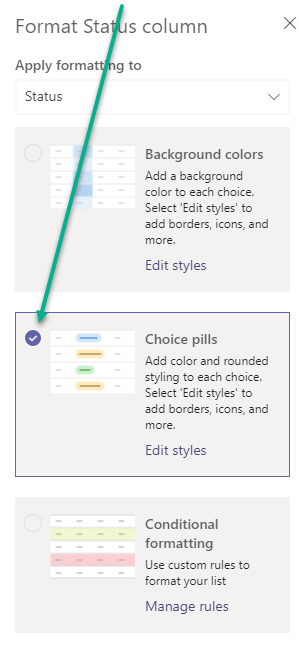
- After selecting ‘Format this column’, a panel will appear to the right with options appropriate to the type of field selected. For the ‘Status’ field, I chose to use ‘Choice pills’ to format values.Note that the formatting options available will depend on the type of field you want to format. For example, if a field is of type ‘Number’, a formatting option for ‘Data bars’ will be available, but no ‘Choice pills’. And text fields generally only have the ‘Conditional formatting’ option.
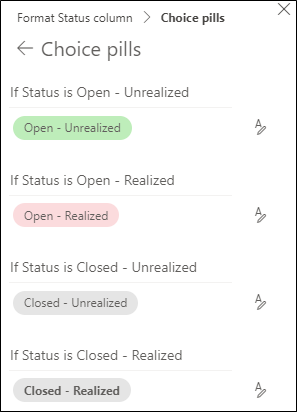
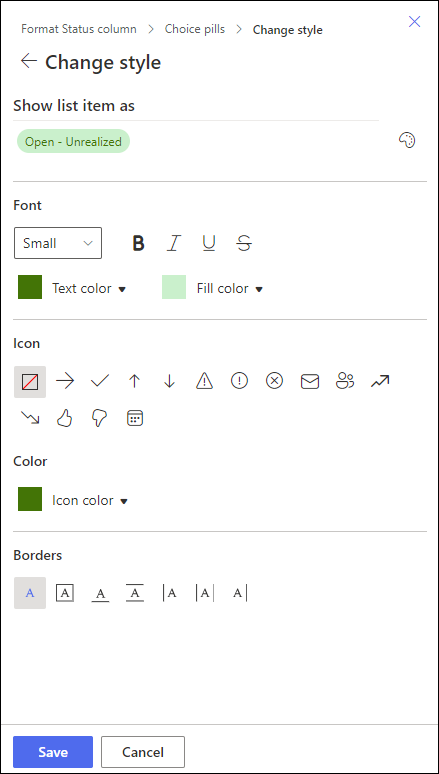
- When you select ‘Edit styles’ from the choice pills option, the following panel appears. Lists will provide some pre-defined formatting for the values of ‘Status’, but each option is editable to match your needs.
- To change from the default formatting, select the ‘pencil’ icon to the right of each status value. From here you can select the background and font color combination you prefer for that value.
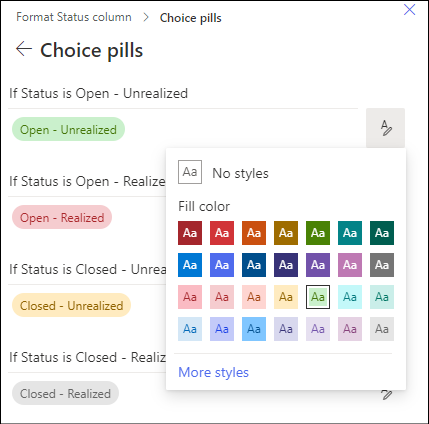
- If for some reason this isn’t custom enough, you can click the ‘More styles’ link to display additional options.
And that is it! Easy peasy.
Custom Formatting in a Row
Formatting rows is not so different from customizing a column. To apply cusrom row formatting, you are really customizing the entire list view. To access, click the dropdown arrow beside the All items view and select ‘Format current view’.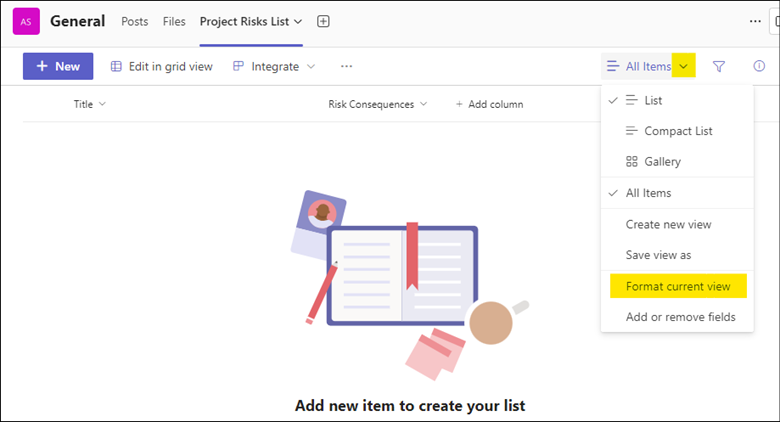
You are presented with two options:
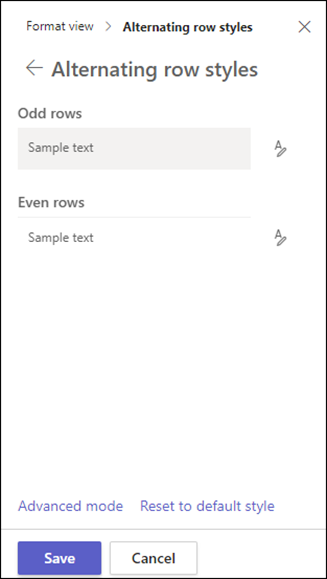
- “Alternating row styles” – this allows you to format odd rows differently than even rows. And as with ‘Choice pills’, you have the ability to customize the color choices or make advanced changes.
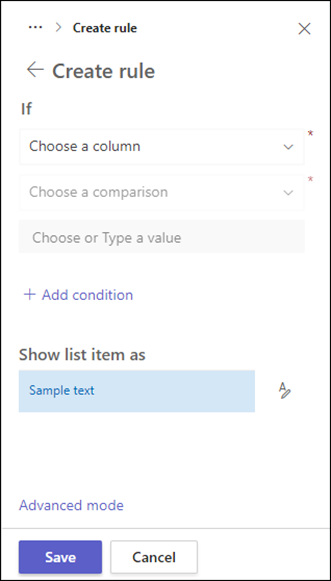
- Conditional formatting – this allows you to use custom rules to format the list based on certain column values. When the panel is displayed, click on the ‘Add rule’ link to define your custom formatting.
Again, that’s it! And again, easy!
Summary
I wanted to play around with Microsoft Lists and see how easily it integrated with Microsoft Teams. I found that it worked great! For the types of lists I wanted to create – e.g. Risk list, Issues list, etc. – the creation process is not a lot different than how you would create and format a list directly from within SharePoint itself. But I did like how I could create a formatted custom list from within Microsoft Teams using the Lists app, where the only time I needed to go into SharePoint was to add a calculated field.
Also, this may be small, but I also like how when are adding or editing an item in the list, the standard edit form displays full screen instead of in a narrow panel to the right, like it does when in SharePoint and using the standard edit form. Below is an example of the Microsoft Teams add/edit view for my Risks list.

And if you wanted to create the list as a template…
Lastly, I really like that once a List has been created, the list is easily available to other Microsoft Teams sites as a template. This is done by following the steps above and then instead of selecting ‘Blank list’ as noted, select ‘From existing list’.
![]()
This page will give you the option to select a specific Team or site to select and once selected, all lists within the site are available to select.

Pick a list or library and click Next. A blank copy of the list will be created in your Teams site. How cool is that?
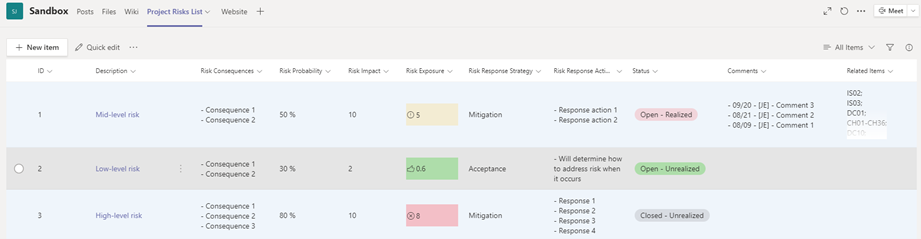
Here is an image of my Risks List Template fully formatted:
CONTACT THREEWILL TODAY TO MAKE TEAMS WORK FOR YOUR ORGANIZATION