
Matthew Chestnut is a Senior Consultant at ThreeWill. He has over 25 years of software development experience around enterprise and departmental business productivity applications. He has a proven track record of quality software development, on-budget project management and management of successful software development teams.
Related ThreeWill blog articles
Using Power Apps to Create a No-Code / Low-Code Time Off Request Solution: Part 1
Introduction
In her initial blog post, Kathleen Hugh provided a thorough walk through of creating a no-code Time Off Request solution using a SharePoint list and Power Apps, covering two primary topics:
- Create a SharePoint List to store the time off requests
- Create the Power Apps Solution to manage the time off request data in the SharePoint list
In her conclusion, Kathleen mentioned additional topics for the purpose of making the time off request solution even more robust:
Data validation
- Prevent end date from preceding the start date
- Enforce a valid pattern to the manager’s email
Data security
- Restrict user’s access to list items
Notifications, workflows, and approvals
- Auto-populate the status throughout the life cycle of the request
- Route the request to the manager for approval/rejection
- Send an email back to the requester upon approval/rejection
Data Validation in Power Apps
In general, proper data validation will ensure the integrity of the data collected and, if done properly, will guide the user in providing correct data. In this blog post I will delve into some of the data validation capabilities in Power Apps, specifically to answer a couple of points Kathleen raised in her original post:
- Prevent end date from preceding the start date
- Enforce a valid pattern to the manager’s email
Moreover, I will demonstrate how to achieve these additional validation patterns:
- Validate that required fields have a data value
- Allow save only if data passes validation
Required Fields
SharePoint List Fields – Required Attribute
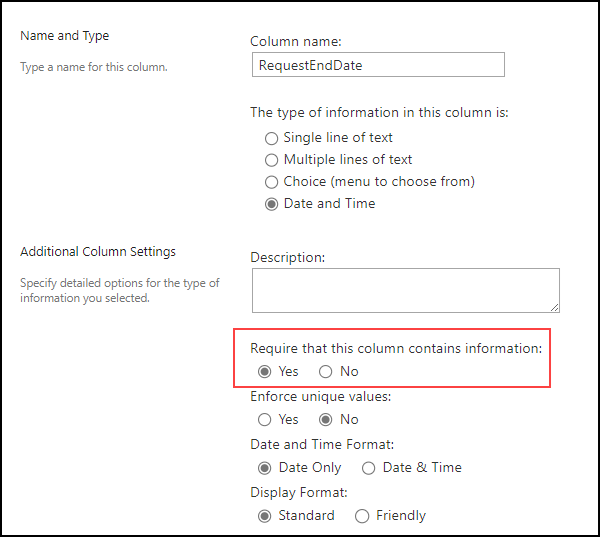
There are several “required” fields in the Time Off Request SharePoint list. Here is a screen snippet showing the list field “required” property for Request End Data:
Required Field Validation at Runtime
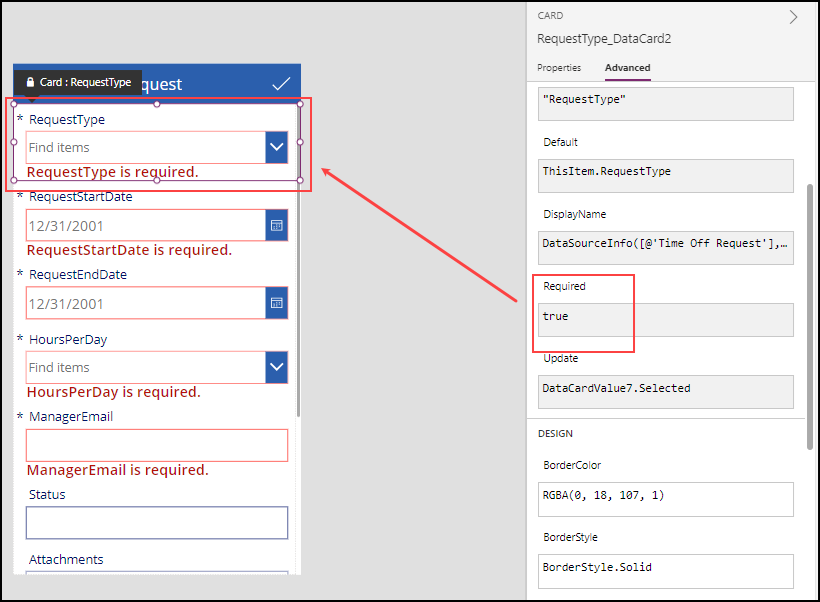
The “required” field setting from the SharePoint list controls the generated Power App data card “Required” property.
To emphasize, whenever a new list item is added via the generated Power App, validation for required fields automatically happens on “save”. For example, here is an example of Request Type field validation in the Power App and the associated data card “Required” property:
Indicating Required Field in the User Interface
A common pattern in user interface development is giving the user a visual indicator of fields on a form that require values.
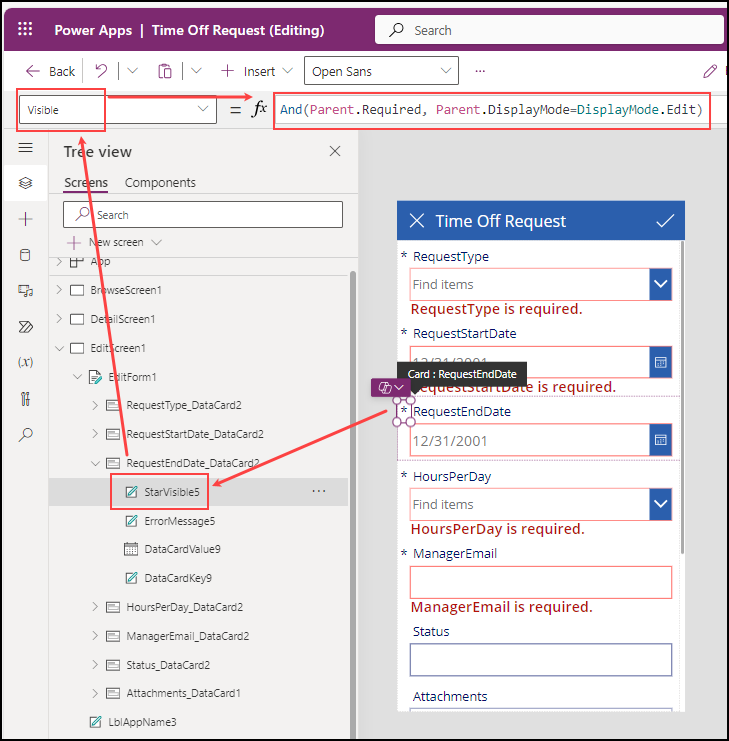
In the generated Power App, each data card that maps to a SharePoint list field has a “StarVisible” label that has a formula to show an asterisk (the star) if the field is required. On the label field that contains the “star” (asterisk), we show the label if the data card attribute is set to “required” and the form is in edit mode.
- There is no need to show the “star” to indicate the field is required if we are simply viewing the data in read-only mode.
- Keep in mind when using Power Apps you can make a field required even if it is not required in the SharePoint list field definition.
- But you will not be able to “relax” the required attribute, i.e. make the field optional, in Power Apps if the field is required by SharePoint. SharePoint will send back an error message when trying to save the form data.
Prevent End Date from Preceding the Start Date
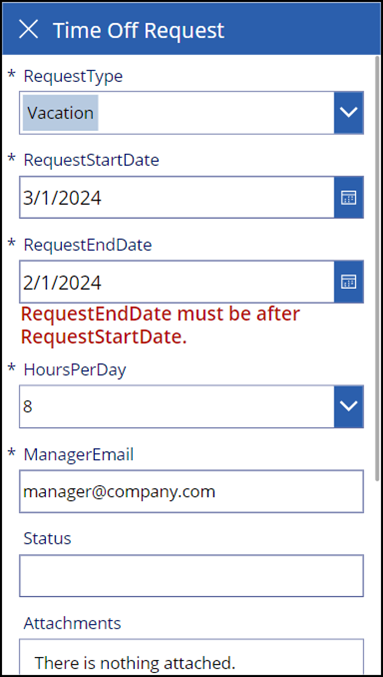
Now we introduce some additional data validation in the Power App form where we confirm that the Request End Date is on or after the Request Start Date.
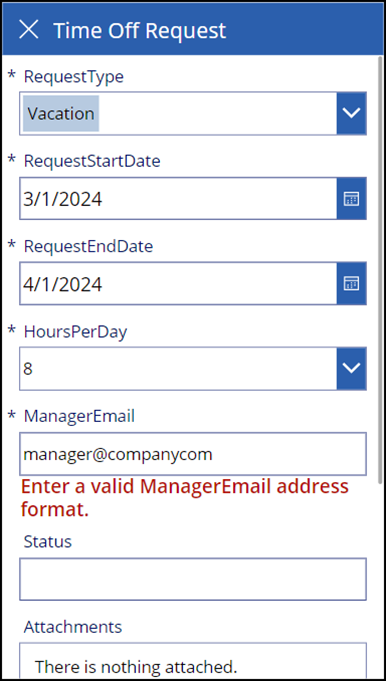
Example validation message
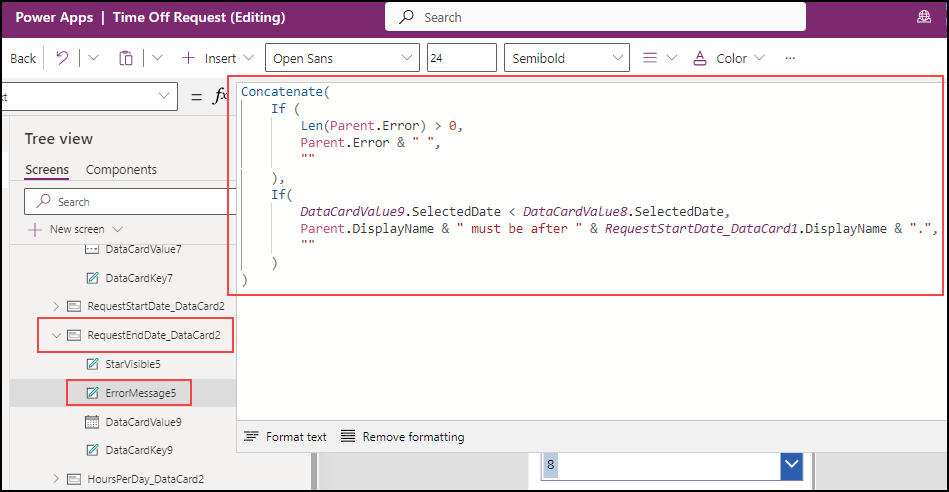
Write this formula in the Text property of the Error Message field for the End Date data card. This formula will display both the required field validation as well as the end date validation text.
Concatenate(
  If (
    Len(Parent.Error) > 0,
    Parent.Error & " ",
    ""
  ),
  If(
    DataCardValue9.SelectedDate < DataCardValue8.SelectedDate,
    Parent.DisplayName & " must be after " & RequestStartDate_DataCard1.DisplayName & ".",
    ""
  )
)
Enforce a Valid Pattern to the Manager’s Email
For an additional bit of data integrity, let’s confirm that the email address entered is in the appropriate format.
- We’ll use the built-in Power App IsMatch() function to assist with validation.
- For more information regarding IsMatch, see: https://learn.microsoft.com/en-us/power-platform/power-fx/reference/function-ismatch#predefined-patterns.
Example validation message
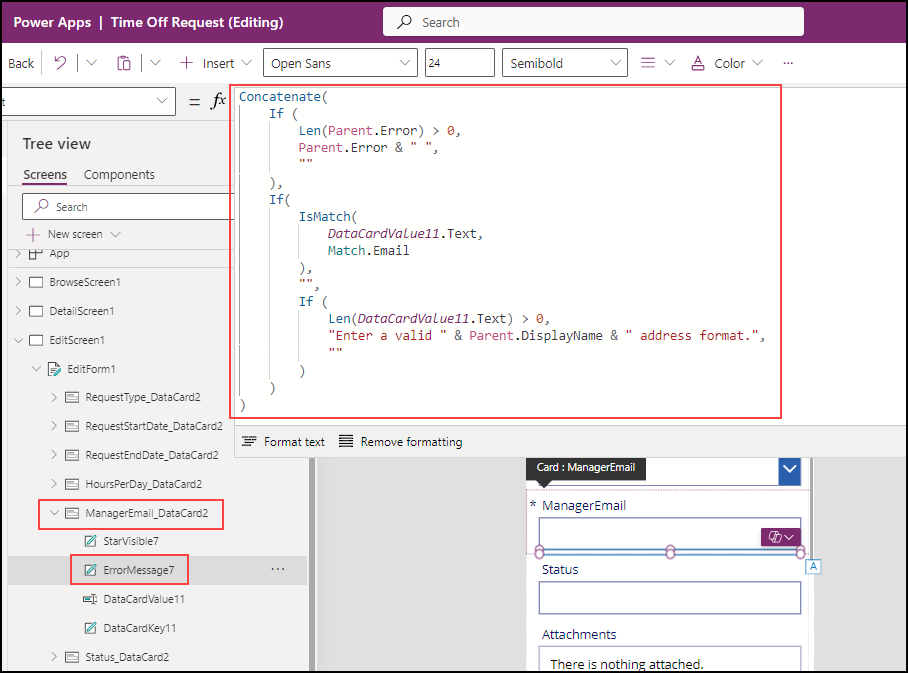
Write this formula in the Text property of the Error Message field for the Manager Email data card. This formula will display both the required field validation as well as the email validation text.
Concatenate(
  If (
    Len(Parent.Error) > 0,
    Parent.Error & " ",
    ""
  ),
  If(
    IsMatch(
      DataCardValue11.Text,
      Match.Email
    ),
    "",
    If (
      Len(DataCardValue11.Text) > 0,
      "Enter a valid " & Parent.DisplayName & " address format.",
      ""
    )
  )
)
Allow Save Only if Data Passes Validation
A common pattern is to hide or disable the save / submit button in the event the form data does not pass validation. We do not want to have invalid data stored to the SharePoint list.
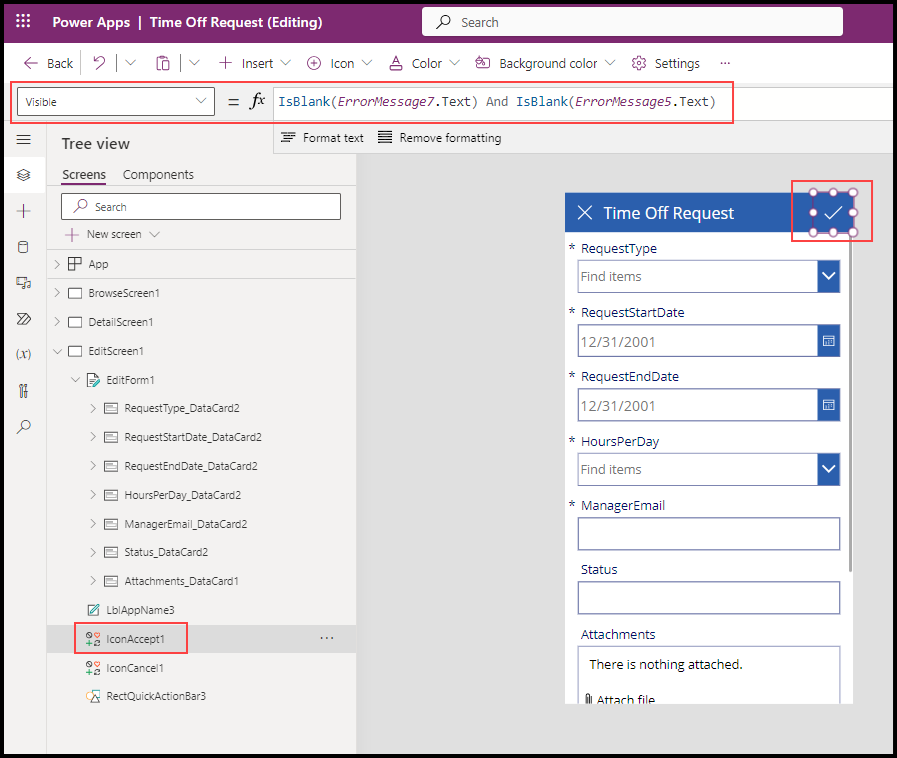
Write this formula in the Visible property of the Accept icon for the form. This formula checks to make sure that the error text is blank for the end date and manager email fields. To clarify, existence of error text indicates there is an error for that field; conversely, if the error text for that field is blank, then no error.
- In this example we are only validating Request End Date and Manager Email. Extend this formula to validate additional fields.
IsBlank(ErrorMessage7.Text) And IsBlank(ErrorMessage5.Text)
What’s next?
In this blog post we made the Time Off Request Power App more robust by adding additional data validation. For an upcoming blog post I’ll tackle the other topics that Kathleen mentioned in her original blog post:
- Restrict user’s access to list items
- Auto-populate the status throughout the life cycle of the request
- Route the request to the manager for approval/rejection
- Send an email back to the requester upon approval/rejection
Thank you for following along on the journey to create a no-code / low-code Power Apps solution.